Australian National Maritime Museum
Go and see the Australian National Maritime Museum, home to fantastic exhibitions that explore Australia's links to the Sea
A visit to the Australian National Maritime Museum is ideal for a fun-filled day of exploring various Australian maritime activities, European seafaring, aquatic sport, as well as the maritime defence of Australia's shores.
Be sure to check out Wharf 7 Maritime Heritage Centre, which houses the Vaughan Evans Library, boat building workshops, museum collection storage, ship model workshop, a conservation laboratory and display area. If you are a water sports enthusiast, you will not want to miss out on the spectacular exhibition that the Museum houses. Here, you will be able to climb into and explore the Blackmores First Lady – Australia's most famous yacht. Since its official opening in 1991 the Australian National Maritime Museum has accrued a collection of over 40,000 objects.
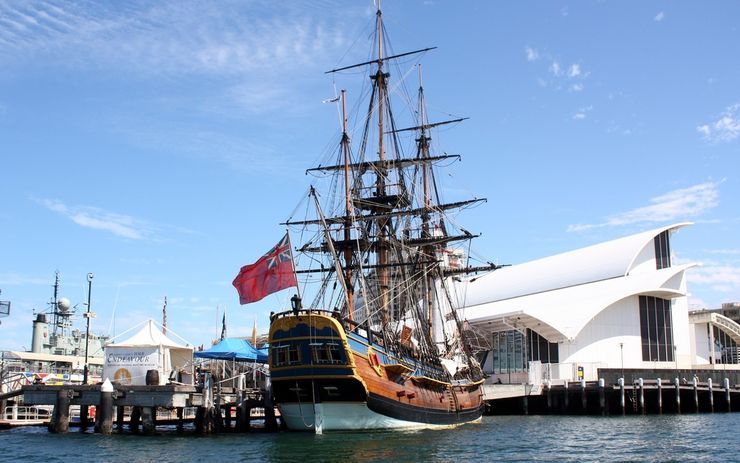
In addition to the vast indoor exhibits, the museum also has over ten different real vessels for you to explore including a submarine.
The museum offers a variety of different activities for all ages. If you are feeling adventurous, they even offer a sailing cruise on the beautiful Sydney Harbour in either an authentic tall ship or aboard a luxury yacht.
Nearby attractions: Star City Casino and Lyric Theatre, Sydney Aquarium, Wild Life Sydney, Imax Theatre, Chinese Gardens, Powerhouse Museum, Paddy's Market and Chinatown.

Facts For Your Visit
Fee: Yes.Australian National Maritime Museum Hours:
Opening hours may differ on holidays
- Monday: 10:00 AM – 4:00 PM
- Tuesday: 10:00 AM – 4:00 PM
- Wednesday: 10:00 AM – 4:00 PM
- Thursday: 10:00 AM – 4:00 PM
- Friday: 10:00 AM – 4:00 PM
- Saturday: 10:00 AM – 4:00 PM
- Sunday: 10:00 AM – 4:00 PM
Address: 2 Murray St, Darling Hbr, Sydney NSW 2000, Australia
Phone: (02) 9298 3777
Official Website: Australian National Maritime Museum
Australian National Maritime Museum Reviews
Rated out of 5![]()
![]() We recently visited this museum with the kids and enjoyed our tour. The tours of the HMAS Vampire Navy Destroyer and HMAS Onslow submarine were quite impressive and educational for both kids and adults. It was nice to also see a bit of PNG naval history in the museum, a big Sepik dug out canoe, lakatoi and Milne Bay canoe also. Would recommend taking the kids and purchasing tickets online in advance.
We recently visited this museum with the kids and enjoyed our tour. The tours of the HMAS Vampire Navy Destroyer and HMAS Onslow submarine were quite impressive and educational for both kids and adults. It was nice to also see a bit of PNG naval history in the museum, a big Sepik dug out canoe, lakatoi and Milne Bay canoe also. Would recommend taking the kids and purchasing tickets online in advance.
Nacca 368 - 2 months ago
![]() Located in the heart of Darling Harbour, the Australian National Maritime Museum is a world-class destination that masterfully captures the nation’s deep connection to the sea. The highlight is undoubtedly the floating fleet; stepping inside the HMAS Onslow submarine provides a thrilling, claustrophobic glimpse into naval life, while the majestic HMB Endeavour replica offers a journey back in time. Inside, the galleries are equally impressive, featuring everything from Indigenous seafaring traditions to contemporary ocean science. It is an immersive, family-friendly experience that balances history with interactive fun. Whether you're a history buff or a curious traveler, it’s a must-visit.
Also beware of the closing hours of many of the ships, some will close at noon or at 2:30PM.
Located in the heart of Darling Harbour, the Australian National Maritime Museum is a world-class destination that masterfully captures the nation’s deep connection to the sea. The highlight is undoubtedly the floating fleet; stepping inside the HMAS Onslow submarine provides a thrilling, claustrophobic glimpse into naval life, while the majestic HMB Endeavour replica offers a journey back in time. Inside, the galleries are equally impressive, featuring everything from Indigenous seafaring traditions to contemporary ocean science. It is an immersive, family-friendly experience that balances history with interactive fun. Whether you're a history buff or a curious traveler, it’s a must-visit.
Also beware of the closing hours of many of the ships, some will close at noon or at 2:30PM.
Steven Cheng - 4 months ago
![]() We had an amazing experience at the Maritime Museum! My little one and I spent a wonderful day exploring, and it was such a memorable outing. The staff were incredibly friendly and welcoming, making the visit even more enjoyable. The museum itself is fascinating, with an impressive collection of exhibits. The photo gallery was especially great – we took some beautiful pictures! Highly recommend a visit for anyone looking to spend a fun and educational day out.
We had an amazing experience at the Maritime Museum! My little one and I spent a wonderful day exploring, and it was such a memorable outing. The staff were incredibly friendly and welcoming, making the visit even more enjoyable. The museum itself is fascinating, with an impressive collection of exhibits. The photo gallery was especially great – we took some beautiful pictures! Highly recommend a visit for anyone looking to spend a fun and educational day out.
keerthana yegoti - 4 months ago
![]() Great museum we enjoy visiting with all our visitors in Sydney. In particular the submarine is impressive. But also the other vessels are awe-inspiring if you understand how many people served on these small spaces for such long times.
We repeatedly also come for amazing photography exhibitions. Make sure you arrive in style using a ferry from Circular Quay. :-)
Great museum we enjoy visiting with all our visitors in Sydney. In particular the submarine is impressive. But also the other vessels are awe-inspiring if you understand how many people served on these small spaces for such long times.
We repeatedly also come for amazing photography exhibitions. Make sure you arrive in style using a ferry from Circular Quay. :-)
Andreas Ludwig - 3 months ago
![]() Definitely worth the visit. Lots to see and do. I personally enjoyed the submarine and destroyer excursions. Give yourself 2-3hrs to cover most of the exhibits. Longer if you are a complete station reader and info gatherer.
Definitely worth the visit. Lots to see and do. I personally enjoyed the submarine and destroyer excursions. Give yourself 2-3hrs to cover most of the exhibits. Longer if you are a complete station reader and info gatherer.
Michael M - 2 months ago
![]()
Directions
| Train Line | Nearest Station | Walking Time |
|---|---|---|
| Sydney Light Rail - L1 | Pyrmont Bay | 1 minute |
| L2. T1, T2, T3 or T4 | Town Hall | 17 minutes |
How to get to Australian National Maritime Museum by Train
By Light Rail - L1: exit at Pyrmont Bay MLR Stop. The museum is across Murray Street (east) from the station..
By Train and Bus: exit at Town Hall Station and turn right (north) into George Street, left on Park Street, right on York Street then left on Market Street. When you see the pedestrian ramp on your left follow it up and walk across the Pyrmont Bridge. Alternatively, board the 443 bus on York Street which will take you right to the Museum.
Map & Instant Route Finder
Click&Go Map and Route Finder with public transit, walking, driving or cycling directions. Get up-to-the-minute transit times for your route.
Accommodations near Australian National Maritime Museum:
Photo Gallery
-

The fastest boat in the world is just one of many neat things you'll see in the Australian National Maritime Museum cc licensed photo by Dennis Conrad -

Photo Credit: D-Stanley - cc license via Flickr -

Photo Credit: Bernard Spragg - cc license via Flickr -

Photo Credit: hugh llewelyn - cc license via Flickr -

Photo Credit: hugh llewelyn - cc license via Flickr -

Photo Credit: hugh llewelyn - cc license via Flickr -

Photo Credit: jimbowen0306 - cc license via Flickr -

Photo Credit: hugh llewelyn - cc license via Flickr -

Photo Credit: hugh llewelyn - cc license via Flickr -

Photo Credit: hugh llewelyn - cc license via Flickr -

Photo Credit: hugh llewelyn - cc license via Flickr
